DIY: Satin and Tulle Ruffle Flower Hair Piece
3:37 PM
DIY: Satin and Tulle Ruffle Flower Hair Piece
These two lovebirds were married this past weekend. I am so glad that my brother picked cute Natalie to be my new sister! She is just darling. We were so lucky to celebrate with them on their special day. There was great food, wonderful people and of coarse we got to dress up all fancy, which I am a huge fan of. The little girls in the family all wore lovely lace dresses. To go along with their little dresses I wanted to make each of them beautiful hair pieces.
 I got my inspiration from a little flower I bought my little girl for her birthday. I examined the pretty flower and decided that I could figure out how to make it.
Here is what I came up with.
First I found a flower template online that had eight petals as seen below. I then found some satin-like fabric and tulle that I thought complimented the dresses that the girls would be wearing. (I bought this at hobby lobby. I only bought 1/8 of a yard, which cost less than a dollar)
I used my eight petal flower as a pattern, and cut 9 satin flowers and 9 tulle flowers for each hair piece.
I didn't show this, but I cut out a small felt circle to sit as a base of the flower. This is what I hot glued the entire flower to.
Fold a satin and tulle flower in half. (put the tulle in the middle)
Hot glue, or sew this in the center so that the tulle stays put. Just a little dab will do ya.
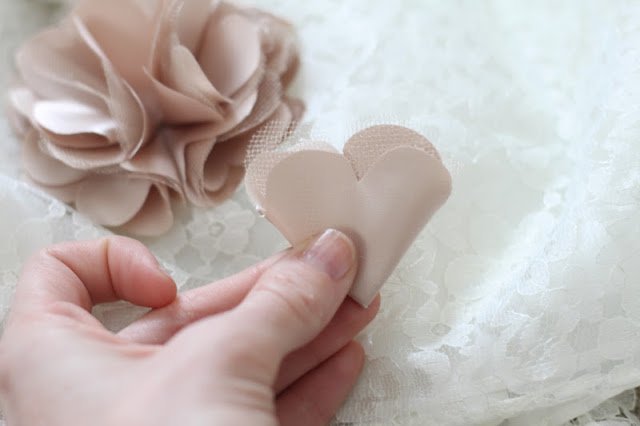
Fold your half-flower in half once more so that it resembles a heart. Hot glue the center once more (where the petal comes to a point).
Glue the folded heart to the felt circle as seen below. Only glue the center tip, so that you can fluff the petals up to make the flower look fuller. Do two levels of this. The bottom level will have four heart-shaped petals, and the second level with have four heart-shaped petals on top of that for a total of eight heart-shaped petals. Each level will fill the circle perfectly.
Finally take your last flower and fold it in half. Once it is folded in half roll it.
This will be the center of your flower.
Hot glue or sew this rolled piece to the center of your flower.
Fluff fluff fluff...
Finally add a clip to the back of your flower.
You can clip the flower directly into the hair or add it to a matching headband as seen below.
How easy is that? And it only cost about $1 per hair piece! Simply beautiful for a simply wonderful day!


7 comments
So clever! And this kind of post makes me wish I had a little girl. My boys never let me decorate them. ;)
ReplyDeleteDarling!
ReplyDeletelove it. You need a pin it button on your blog. Maybe I haven't look harder enough for it.
ReplyDeleteI have been trying to figure out how to make these forever. Thank you, thank you, thank you!!!!!
ReplyDelete@all... thanks for the sweet compliments! It is so very fun to decorate my princess! @brynley, we really do need to get a button on each post. Thanks for the idea! @jaada, you are so very very welcome!
ReplyDeleteCan you tell me how to keep the fraying to a minimum? Love the tutorial, been looking for a good one for a while!!
ReplyDeleteSimple
ReplyDelete